BASIC ENVIRONMENT CONSTRUCTION
This tutorial will take you through the steps to create a basic environment in idStudio. A prior understanding of idStudio Basics is recommended.
1. Getting Started
Every environment constructed in idStudio need three basic components:
- Brush Geometry that surrounds all entities.
- A PlayerStart entity for the Player to start from.
- A Light entity to light the environment.
To get started, open idStudio and navigate to the World Editor by clicking the World Edit tab at the top.
2. Creating Brush Geometry
We need to draw out some brush geometry to create our first working environment. As mentioned above in Getting Started, every working environment needs brush geometry surrounding all entities.
To draw out a brush, Left Mouse Button (LMB) + Drag anywhere in the 2D Camera View of World Edit. As you draw out a brush, notice the 3D World Camera is also updated. Brushes also generate collision by default, so we do not need to worry about doing a separate collision pass for this tutorial.
Here are a few ways to edit brushes:
- Press Escape (ESC) to de-select a brush.
- Press Shift + LMB to select a brush.
- While selected, press Backspace to delete a brush.
- While selected, LMB + Drag outside a brush to resize in that direction.
2.1 Floor
Start by creating a 512x512 brush that will represent our Floor.
Navigating the World Editor:
To move around the viewport in the World Editor use the right mouse button.
To zoom in and out, scroll up or down with the mouse wheel.

When dragging a brush, you can press Shift + Q while a brush is selected to see it’s dimensions and coordinates.

2.2 Walls
Let’s now create the Walls. Drag out an 8x512 brush on any side of the Floor brush.
Note: To drag a new brush, the previous brush should now be deselected. Press Escape to de-select a brush.
We then need to extend its height by 256 units. Cycle through the 2D Camera View using Ctrl + Tab. You will notice the text in the top-left portion of the 2D Camera View change as you cycle through. Set it to Side and raise the height of the brush to 256 units.

Set the 2D Camera View back to Top. Repeat the above steps in creating a Wall to the other three sides of the Floor. You can adjust the 3D Camera View to get a better angle on your geometry.
Navigating the Preview Window:
To move around in the World Camera View, hold the RMB and drag the mouse in the direction you want to move.
To Move Up and Down, hold CTRL + Right Mouse Button, and Drag Up or Down
2.3 Ceiling
For the Ceiling, we could create a brush similar to the Floor, only on top of the Walls. For this tutorial, let’s duplicate the Floor and move it above the Walls. This will be our Ceiling. Select the Floor brush and press Spacebar to Copy + Paste the new brush. While selected, position the brush on top of the Walls.

Our environment is now properly sealed using six brushes, but it does look a bit bland. Let’s look at how to apply Materials to our brushes.
More Brush and Patch Creation information can be found here.
3. Applying Materials to Brush Geometry
Applying Materials to brush geometry is done completely through the 3D World Camera. Clicking on a material in the Materials Browser will apply it to the face of a currently selected brush or brush face. This also applies a planar UV mapping to the selected brush faces.
Here are some shortcuts regarding applying materials:
- Ctrl + Shift + LMB selects a brush face.
- Ctrl + Shift + Alt + LMB selects multiple brush faces.
- Pressing “S” will shortcut to the Surface Inspector.
In this tutorial, let’s first assign a “caulk” material to all brushes, then assign different materials to the inside faces of the Floor, Walls, and Ceiling brushes.
To begin, let’s select all the brushes in our map. A quick way to select multiple brushes is to use Marquee Select. Alt + LMB + Drag in the 2D Camera View will draw out a box that selects everything within it. Alt + Ctrl + LMB + Drag de-selects everything within.
Next, we will assign a “caulk” material to all the selected brushes. This material still seals all entities within it, while not creating any actual polygonal geometry at Build time. With all the brushes in the map selected, navigate the Materials Browser - > Textures -> Common, and select “caulk”. This will apply this material to all the brushes.
Note: When you first open the material browser, the location is set to decls/material. You may only see a "texture" folder, not a "textures" folder. If this is the case, you will need to toggle the "Toggle Hide Items" button, which is the icon with the red 'No' symbol in front of a grey box. Or, you can try clicking the icon with the home in the Materials Browser will return you to the default folder in the browser.

Now navigate the Material Browser and find some suitable materials for the Floor, Walls, and Ceiling. This time we will only apply materials to the inner faces of the brushes. Position the 3D Camera View to inside the box environment you have built. Select the Floor, Walls, and Ceiling brush faces and apply some materials accordingly.
The following textures were used for this tutorial:
| Floor: | textures/d_industrialcity/concrete3f |
| Walls: | textures/d_industrialcity/metal_sign |
| textures/d_industrialcity/metal_pp_gv | |
| textures/d_industrialcity/metal_panels4 | |
| textures/d_industrialcity/metal_pp | |
| Ceiling: | textures/d_industrialcity/metal_2_dark |
3.1 Surface Inspector
After adding a texture to a brush, open the Surface Inspector. In the default layout, this is located on one of the tabs on the bottom left corner of the editor.

The surface inspector allows you to manipulate the material you have added to a brush face by shifting, rotating, or scaling the texture, or by selecting from preset options.
With a textured brush selected:
- Enter a value of 0.5 into the box next to Shift Horizontally, and click the up arrow. Notice in the World Camera View that the texture shifted by 50% horizontally.
- Reset the texture - In the Texturing Section of the Surface Inspector, enter values for Width and Height each to 1 and press the Fit button.
NOTE: The value entered in the boxes are the incremental amount per click of the up or down arrow. This is explained easiest by using the Rotate Property:
- Enter the value of 15 into the box labeled Rotate, and click the up arrow. Notice the texture in the World Camera View has rotated a small amount, 15 degrees.
- Click the down arrow once for Rotation to set the texture back to its normal position.
- Now enter a value of 90 into the box labeled Rotate, and click the up arrow. Notice the texture has rotated by a value of 90. Click the down arrow once to rotate it back.
Click here for more information on the Surface Inspector.
Your environment should now look something like this:

4. Adding Entities
Before we can Build and Run the environment, we need to add some Entities. We will need a Light entity to light the map, and a PlayerStart entity to begin from. All entities are added the same way and their properties can be edited in the Entity Inspector.
4.1 Adding a Light
Right-Clicking in the 2D Camera View allows you to select from a list of entities to place. Right-Click and select New Light. Position the new Light entity in the center of the room. Now, in the3D World Camera view, press “F3” to render real-time. You should see your light working like this:

4.2 Adding a PlayerStart
Now let’s add a PlayerStart, an entity that specifies where to begin from in-game. Right-Click and go to New Entity>player>start. Position the PlayerStart anywhere in the map. You can adjust the initial view angle by pressing “R” to rotate the entity.
5. Building and Running the Map
Now that we have our Geometry, Lighting, and PlayerStart, we are now ready to Build and Run the environment. For this tutorial, we will only be building a “Slowmap” version of the environment, which is only raw assets and geometry and not a Megatextured/Combo version.
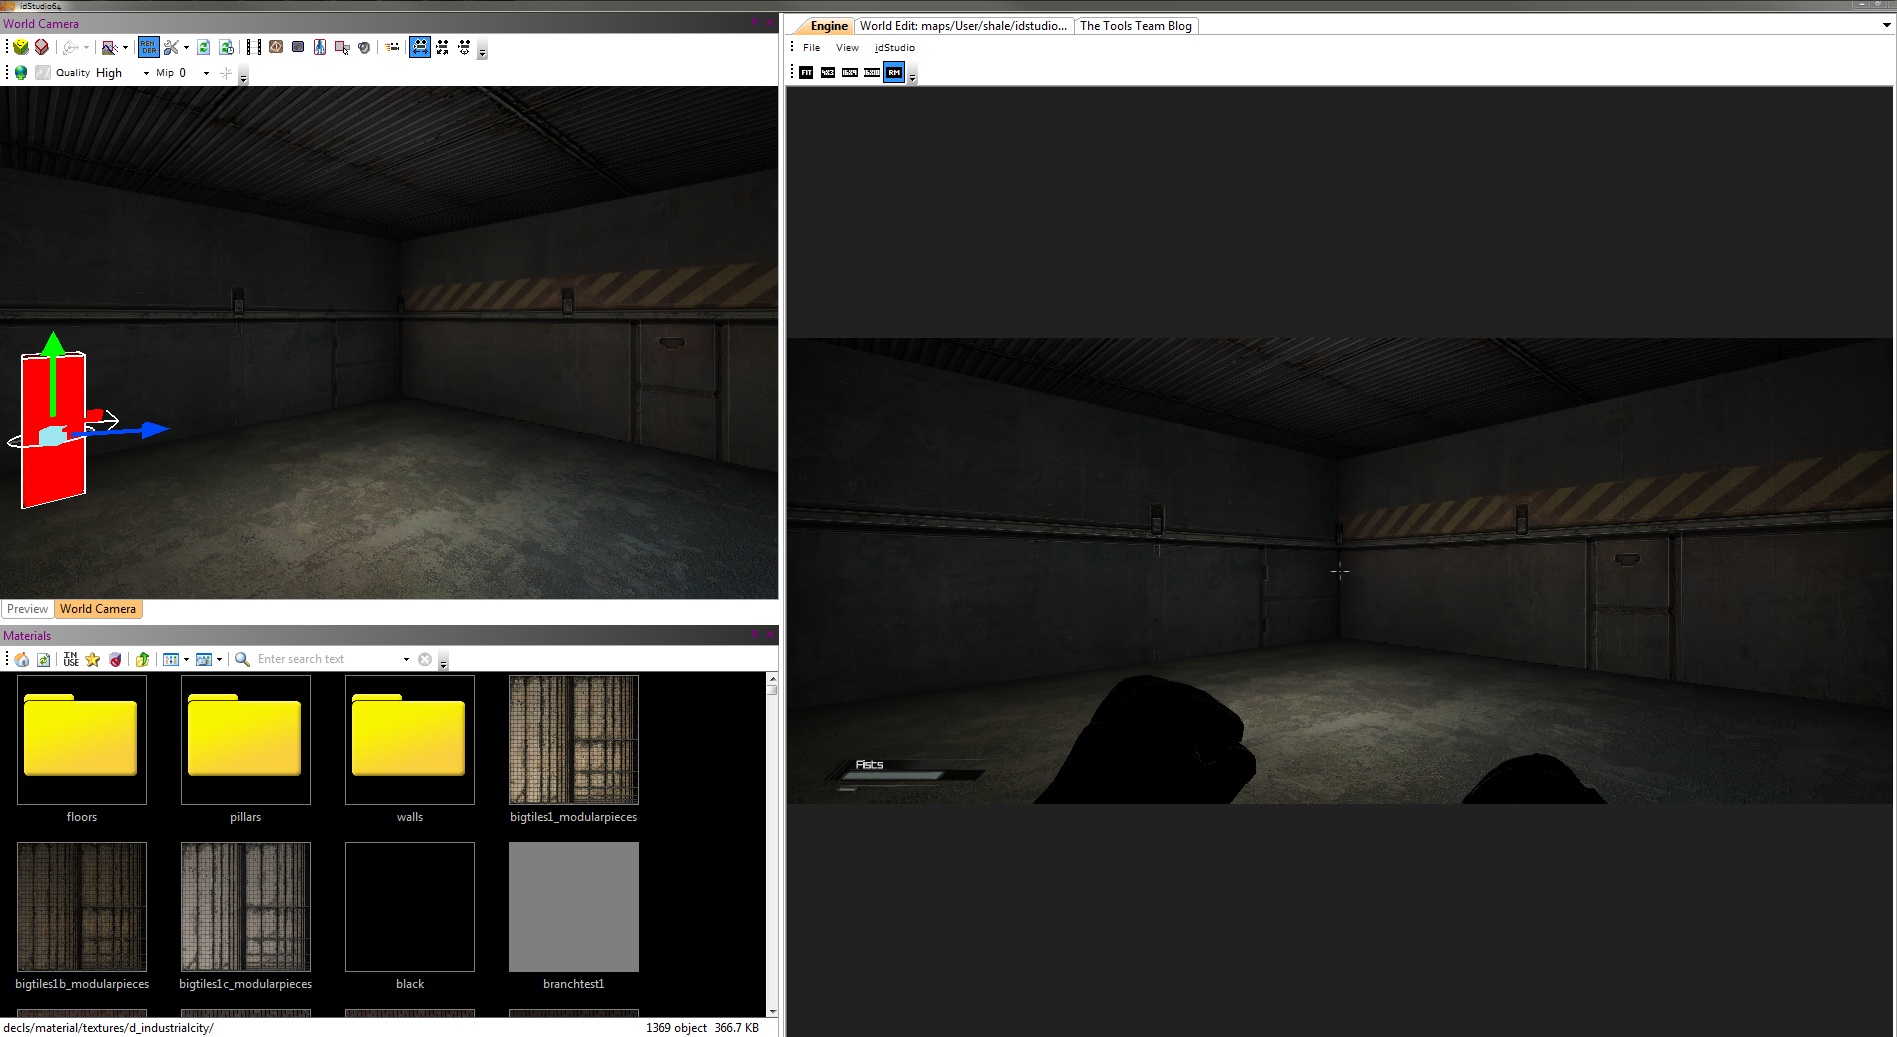
First, save the environment.. Then go to Build>Slow Map Build and let the Build process finish. When finished, click the Engine tab next to the World Edit tab and press the Tilde “`” key to bring down the console. Here, we will first specify “slowmap” then the path and name of the environment we just saved.
The environment should load in-game and should look something like this: