Brush and patch creation
Brushes form basic geometry, and a patch will turn a simple brush into a more complex object. Below you will find the essentails of using both.
Creating a Brush:
To create a brush, simply drag the mouse over the grid in the World Editor.
Re-sizing the Brush:
With the brush selected, place your mouse outside of the top edge of the brush. Then, Click and drag the mouse to re-size the brush. Notice only the top edge of the brush will move as you drag. The brush will re-size according the side of the brush the mouse was placed near.
Moving the Brush:
You can move the Brush by selecting inside the bounds of the brush, and Left Click+ Drag the mouse.
Deselecting a Brush:
Press Escape to deselect the currently selected brush.
Selecting a Brush
Hold Shift+ Left Mouse Click to select a brush.
Options in the Brush Menu
With a brush selected, In the Main Menu of the World Editor, and drop down the Brush menu.
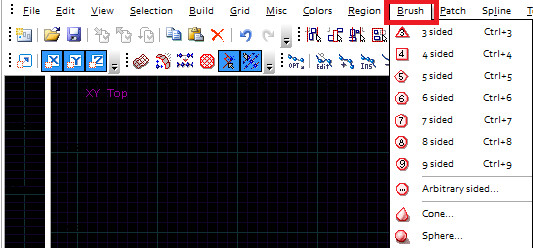
Creating Brushes with a Specific Number of Sides
Selecting from any of the 7 listed sided options in the brush menu will transform your brush to that selection.
You can also hit Ctrl + the number of sides you want your brush to have:
| 3 sided | Ctrl+3 |
| 4 sided | Ctrl+4 |
| 5 sided | Ctrl+5 |
| 6 sided | Ctrl+6 |
| 7 sided | Ctrl+7 |
| 8 sided | Ctrl+8 |
| 9 sided | Ctrl+9 |
Arbitrary:
Want more than 9 sides? Give your brush a user specified amount of sides using the Arbitrary option.
Cone:
Turn a brush into a cone with a user specified amount of sides.
Sphere:
Turn a brush into a sphere with a user specified amount of sides.
applying a Patch
Patch will turn a simple brush into a more complex object.
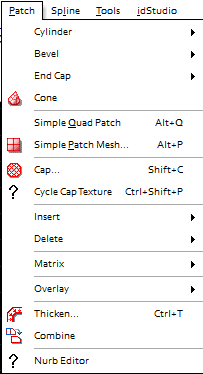
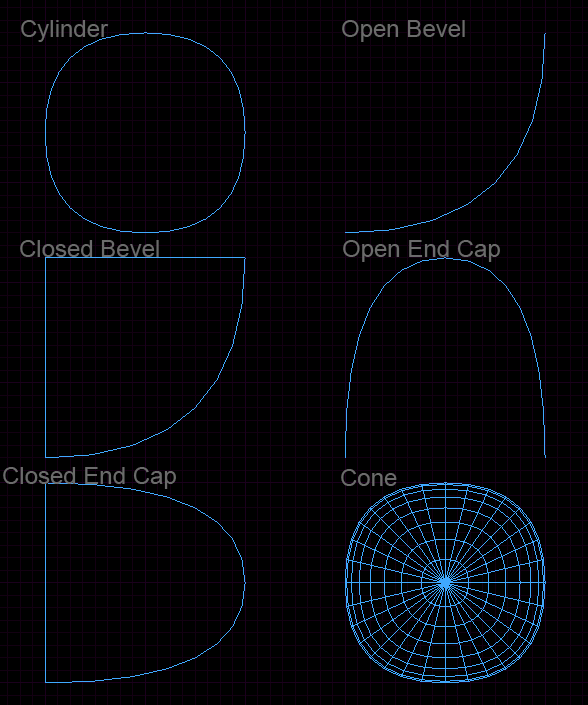
In the following image, a 128X128X128 Brush was created and then transformed using one of the first four options listed under the Patch Menu.
Patch Cap
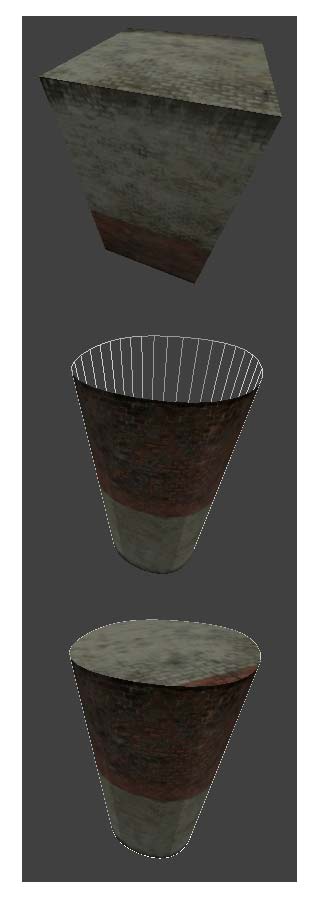
In the following image, a 128X128X256 brush was made. Then a patch was applied from the Main Menu under Patch-> Cylinder-> Cylinder. Notice it is hollow. The patch was capped by selecting Cap from the Patch menu.
Patch Subdivision
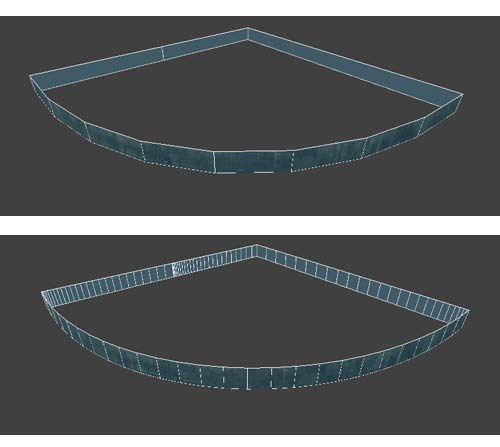
In the top image below, a 128X128 brush was created, and turned into a Closed Bevel Patch. (From Main Menu, select Patch - > Bevel -> Closed Bevel.
Then, in the Entity Inspector, Subdivide Patch was toggled on and Horizontal subdivisions were incremented. (second image)
